Agility Training for Dogs at Home: DIY Guide & Plan
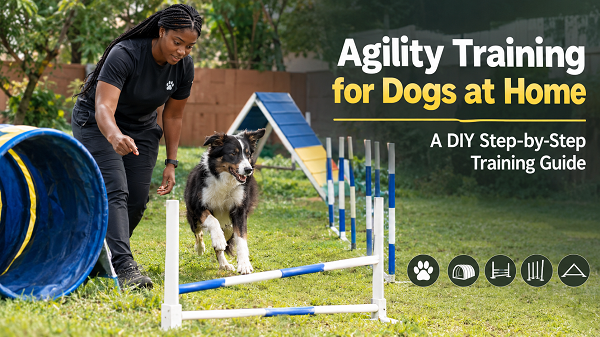
You can absolutely teach your dog agility at home without a club, a coach, or a fenced field. Start with foundation skills (name response, targeting, a solid “wait”), introduce one obstacle at a time using food or toy rewards, keep sessions to 10-15 minutes, and build toward a full sequence over 4-6 months. The equipment matters far less than most guides make it sound, what actually determines success is how you structure the sessions and how you handle your dog between obstacles.
Table of Contents
- What This Guide Covers (And What It Doesn’t)
- Is Your Dog Ready? Age, Health, and the Growth Plate Question
- Foundation Skills to Nail Before You Touch a Single Obstacle
- Your Week-by-Week Home Agility Training Plan
- How to Teach Each Obstacle, Step by Step
- Handling Skills: Why How You Move Matters More Than What You Built
- Training in Small Spaces and Apartments
- Breed, Age, and Temperament Considerations
- Common Mistakes That Stall Home Agility Training
- Pre-Session Safety Checklist
- Gear Worth Having
- About the Trainer
- FAQs
- Conclusion
What This Guide Covers (And What It Doesn’t)
Ever notice how most “agility at home” articles are really just equipment tutorials? PVC measurements, weave pole spacing, tunnel diameters, then a vague “and now train your dog!” tacked onto the end?
We already covered the building side in detail in our DIY dog agility equipment guide, complete with PVC specs, cost breakdowns, and a full materials list. So this guide skips the sawdust and focuses entirely on the part almost nobody explains well: how you actually teach a dog to run agility, session by session, at home, without a trainer standing next to you.
If you haven’t built anything yet, or you’re not sure agility is even the right fit for your dog, start with our beginner’s guide to agility training first. This article picks up from there.
Quick context on why this matters: agility isn’t a niche hobby anymore. The American Kennel Club alone records over 1 million agility entries a year across its trials, and the sport now spans AKC, UKC, USDAA, CPE, and NADAC organizations in the US, plus The Kennel Club and UK Agility across the UK and Europe. It started in England in 1977 as a between-events demonstration at Crufts and grew into one of the fastest-growing dog sports worldwide. You don’t need to compete to get the benefits, but it helps to know you’re teaching a real, structured skill, not just backyard games.
Is Your Dog Ready? Age, Health, and the Growth Plate Question
This is the part I wish every home-agility article led with, because it’s where preventable injuries happen.
The short version: ground-level, non-jumping games can start as early as 4 months old. Anything involving real jump height, hard landings, or weaving should wait until your dog’s growth plates close, generally 10-12 months for small and medium breeds, and 18-24 months for giant breeds like Great Danes, Mastiffs, and Bernese Mountain Dogs. The only way to know for certain is an X-ray, so when in doubt, ask your vet.
Here’s why this isn’t just cautious hand-wringing: a puppy’s growth plates are softer than the surrounding tendons and muscles. If a young dog lands wrong on a jump, instead of a simple sprain, the soft tissue can pull the growth plate apart. That kind of injury doesn’t always heal cleanly and can leave a dog with a shortened or misshapen limb, or a lifelong susceptibility to reinjury. It’s a permanent trade for a few months of impatience.
Age isn’t the only readiness factor. A 2023 survey of over 1,300 competitive agility handlers published in Frontiers in Veterinary Science found that 77% had at least one dog injured during agility activity, and researchers specifically flagged “improvements in equipment and course design” and “physical conditioning programs” as top research priorities for injury prevention. That’s competitive handlers with formal training, proper equipment, and course officials. It’s a useful reality check for anyone building a course in the backyard with less oversight: agility is a genuine athletic sport, not a lower-stakes version of fetch.
Before starting real training, check:
- Growth plates closed (vet-confirmed or age-appropriate for breed size)
- No diagnosed hip or elbow dysplasia, or any joint condition, without vet clearance first
- Basic weight-bearing soundness, no limping, favoring a leg, or stiffness after normal exercise
- Up to date on vaccinations if you’ll ever train around other dogs
If your dog is still too young for jump work, that’s not wasted time, it’s when you build the foundation skills below, which matter more than the obstacles anyway.
Foundation Skills to Nail Before You Touch a Single Obstacle
Most beginners want to skip straight to tunnels and jumps because that’s the fun part. Resist that. Every experienced trainer I’ve spoken with says the same thing: a dog with shaky obedience will hit a wall the moment a course gets more complex than one obstacle.
Before starting obstacle work, your dog should reliably know:
- Name response – turns and looks at you on cue, even with mild distractions nearby
- Sit and down – useful for the pause table and for calming an overexcited dog between reps
- Stay or wait – critical for start-line control later on
- A release cue (“okay,” “go,” “break”) – a specific word that means “you’re free to move,” distinct from just letting the dog wander off on its own
- Recall – comes when called, off leash, in your yard
If any of these are shaky, spend a week or two tightening them up first. Our guide to dog obedience commands that actually work walks through the five that matter most and how to build reliability, not just compliance in a quiet room.
Two more foundation skills that specifically set up agility success:
Hand targeting. Teach your dog to touch their nose to your open palm on cue. This single skill becomes the backbone of luring a dog through a tunnel, over a jump, and along a contact zone later, because you can “target” them toward almost anything without physically guiding them.
A marker word or clicker. Whether you use a verbal “yes!” or an actual clicker, you need a consistent sound that tells your dog “that exact behavior earned a reward,” delivered the instant the behavior happens. Clicker-trained dogs tend to learn new obstacles noticeably faster than dogs trained with delayed verbal praise alone, because the timing gap between behavior and reward shrinks to almost nothing.
Your Week-by-Week Home Agility Training Plan
Here’s a realistic curriculum based on 2-3 short sessions a week, roughly 10-15 minutes each. Longer sessions don’t speed things up, they just tire your dog out mentally before the good learning happens.
Weeks 1-2: Confidence and Targeting Work purely on hand targeting, name response, and getting your dog comfortable moving over slightly unusual surfaces, a wobble cushion, a low board flat on the ground, a tarp. No jumping, no tunnels yet. The goal is a dog who investigates new things instead of avoiding them.
Weeks 3-4: One Obstacle at a Time Introduce the tunnel first (it’s the easiest win, dogs rarely refuse it) and one very low jump, just a few inches off the ground or a pole on bricks. Train each obstacle in total isolation. Don’t chain them together yet, and don’t raise jump height regardless of how confident your dog looks. Confidence at 4 inches doesn’t predict readiness at 12.
Weeks 5-8: Adding the Weave and the Pause Table Weave poles are, without exception, the slowest obstacle to teach. Start the 2×2 method (detailed below) during this window, expect it to still be unfinished by week 8, that’s completely normal. Introduce the pause table as a “stop and hold” game, separate from any course context.
Weeks 9-16: Linking Two and Three Obstacles Once your dog is confidently and independently doing each obstacle alone, start connecting two: tunnel into a jump, jump into the pause table. Keep the connections short and reward heavily at the end of the sequence, not mid-sequence, this teaches your dog to keep driving forward instead of checking in with you after every single obstacle.
Months 4-6: Full Sequences This is when a full 4-6 obstacle backyard course starts coming together. Weave poles are usually still the weak link even now, competition-level dogs sometimes take the better part of a year to get truly fast and reliable at weaving, so don’t benchmark your recreational dog against a YouTube video of a national finalist.
Nobody progresses in a perfectly straight line, some dogs blow through jumps in a week and take four months on weaves; others are the opposite. Track your dog’s actual sessions, not this calendar, and adjust the pace to what you’re seeing.
How to Teach Each Obstacle, Step by Step
This is the training method for each obstacle. For build specs and materials, see the equipment guide.
Tunnel
- Start with the tunnel collapsed to its shortest length, just a few feet.
- Have your dog on one side, toss a treat through to the other side, or have a helper call and reward from the far end.
- As your dog gets comfortable, extend the tunnel and start sending them from farther back before it, rather than walking them right up to the entrance.
- Add a verbal cue (“tunnel!”) right as your dog commits to entering, so the word becomes associated with the action.
Jumps
- Begin with the bar on the ground, literally not raised at all, so your dog just steps or hops over it while chasing a lure.
- Once that’s automatic, raise it 2-4 inches and repeat.
- Only raise the height once your dog clears the current height cleanly, without hesitation, for at least five reps in a row.
- Never wedge, glue, or zip-tie a jump bar so it “won’t fall.” A bar that doesn’t fall away when clipped can catch a leg and cause a serious injury, this is the single most common home-training safety mistake.
- Once your dog jumps reliably with you standing still, start moving alongside them as they jump, this mimics real course handling instead of static “stay and jump” drills.
Weave Poles
This is the obstacle that separates patient trainers from frustrated ones.
The 2×2 method (what most competition trainers use today):
- Start with just two poles set at a slight angle to each other, more like a narrow gate than a straight line.
- Lure or send your dog through the gap from one specific side every time, rewarding the moment they pass through.
- Once that’s automatic, add a second pair of poles a few feet ahead, angled the same way.
- Gradually straighten the poles and close the gaps as your dog’s understanding solidifies, only adding poles once the current set is reliable.
- Resist the urge to add all 6-12 poles at once. This is the fastest way to create a dog who guesses instead of understanding the actual weaving pattern.
Expect this to take 8-16 weeks minimum for a dog training 2-3 times a week. That’s not a sign anything is wrong.
Pause Table
- Teach it away from the agility context first, as a simple “get on this platform and hold a sit or down” game.
- Reward generously for staying on the surface, then gradually add duration before the release cue.
- Once solid on its own, add it as the final obstacle in short sequences, so your dog learns it as the “we’re done, calm down” cue rather than just another jump-like challenge.
Contact Equipment (A-Frame, Dog Walk, Seesaw)
Training-wise, these follow the same “lowest version first” logic as jumps: keep the incline shallow and the height low to start, and never rush a dog onto a full-height contact obstacle. But the honest recommendation, and the one most experienced handlers give, is to leave the actual training on these to a local agility club’s supervised equipment rather than a home-built version. The margin for error on width, non-slip surfacing, and structural stability is small, and a fall from several feet up is a real risk. Most recreational dogs get the large majority of the fitness and fun benefit from jumps, weaves, the tunnel, and the table alone.
Handling Skills: Why How You Move Matters More Than What You Built
Here’s something almost every “DIY agility” article skips completely: your body position, timing, and consistency matter more than any obstacle you can build.
Elite-level agility coaches point out that dogs spend roughly half of a competition run traveling between obstacles, not on them, yet nearly all beginner instruction focuses on the “sexy” equipment and almost none on the connective handling that actually determines how a run flows. For home training, this translates into a few concrete habits:
- Use consistent hand and body signals. If you point differently or stand in a different spot each time, your dog is reading inconsistent information, not learning a pattern.
- Move with intention, not just alongside. Your shoulder direction and the line you run tells your dog which obstacle comes next, more than your voice does.
- Build an “error protocol.” When your dog knocks a bar or misses a weave entry, don’t scold, don’t ignore it either, just calmly reset and re-approach the same obstacle as a normal part of the flow. Making mistakes feel like a smooth part of training (rather than a correction moment) keeps your dog confident instead of hesitant.
- Read what your dog is telling you. Sniffing the ground mid-sequence usually means stress or confusion, not distraction. Zoomies or grabbing random objects often mean overwhelm. Slow down and simplify rather than repeating the same failed rep louder or faster.
If your dog seems unusually anxious, reactive to nearby dogs or sudden movement, or struggles to stay engaged with you around any distraction, it’s worth addressing that separately before layering agility on top. Our guide on calming leash reactivity covers the groundwork that makes agility training go far more smoothly for a dog who currently struggles to focus around distractions.
Training in Small Spaces and Apartments
You don’t need a 30×40-foot backyard to make real progress. Most of the foundation phase (weeks 1-4 above) needs almost no space at all:
- Targeting and marker training can happen in a living room.
- A single low jump fits in a hallway, use a broomstick across two low stacks of books if you’re testing the waters before building anything.
- A short tunnel section (3-4 feet) works in most apartments, just collapse a longer one down.
- Weave pole foundation work (the 2×2 method) only needs about 6 feet of clear floor for the first several weeks.
What genuinely doesn’t translate well indoors: full jump height work (ceiling height and hard flooring both become problems), and anything resembling a full connected sequence at speed. For those, a local park with soft grass, or occasional access to a club’s space, fills the gap. Many agility clubs rent “open training” time for $10-20 an hour specifically for handlers who don’t have their own course, which is often a better investment than trying to force a full-size course into a small yard.
One flooring note that applies everywhere, apartment or backyard: never train jumping or weaving on bare tile, hardwood, or concrete. Dogs need traction to land and turn safely. A yoga mat, rubber-backed rug, or outdoor turf section solves this cheaply indoors.
Breed, Age, and Temperament Considerations
Not every dog needs an identical program:
- Brachycephalic breeds (Bulldogs, Pugs, Boston Terriers) can absolutely enjoy low-impact agility, but keep sessions shorter, watch for labored breathing, and skip hot-weather training entirely, these breeds overheat far faster than average.
- Giant breeds (Great Danes, Mastiffs, Bernese Mountain Dogs) mature later, hold off on real jump height until 18-24 months, but foundation and low-tunnel work can start much earlier.
- Long-backed breeds (Dachshunds, Corgis) can compete, there are dedicated small and long-backed dog leagues, but keep jump heights conservative and avoid sharp twisting weave entries until well-conditioned.
- Senior dogs benefit hugely from low-impact enrichment: tunnels, ground-level targeting, very low jumps, but skip full height and repetitive weaving if there’s any arthritis in play.
- Anxious or nervous dogs often do surprisingly well with agility’s predictable, repetitive structure, since routine can be calming for dogs who find uncertainty stressful. Start slower and reward generously for simply approaching a new obstacle.
- Puppies under the growth-plate threshold should stick to ground games only: targeting, recall through a low tunnel, walking over a flat board. No jumping, no weaving. This is genuinely where most preventable injuries happen, well-meaning owners starting real jump work too early because a puppy “seems ready.”
Common Mistakes That Stall Home Agility Training
- Skipping foundation obedience. A dog that doesn’t reliably respond to “wait” or a release cue will struggle the moment a sequence gets more complex than one obstacle.
- Rushing jump height. Confidence at a low height doesn’t mean readiness at a higher one. Raise height in small increments, and only after several clean reps.
- Overhandling. Giving your dog constant verbal and physical cues prevents them from learning to problem-solve and read the course independently.
- Training too long per session. Fifteen to twenty minutes is plenty. Fatigue, not lack of talent, is usually why a dog “suddenly” starts making mistakes late in a session.
- Ignoring your dog’s feedback. Refusals, sniffing, or avoidance are information, not defiance. They almost always mean the step you just asked for was too big.
- Focusing only on obstacles, never on handling. Since roughly half of any run happens between obstacles, neglecting movement and cue consistency caps how far obstacle skills alone can take you.
- Comparing your dog’s pace to competition footage. Weave poles alone can take the better part of a year even for serious competition dogs. Recreational timelines are not a race.
Pre-Session Safety Checklist
Run through this before every single session, it takes under two minutes:
- Training surface is grass, packed dirt, rubber matting, or turf, never bare concrete or slick tile
- Every jump bar, pole, and connector checked for cracks, wobble, or sharp edges
- Dog has had a 5-minute walk or light trot to warm up first
- Session capped at 10-15 minutes for a beginner dog
- No jump work at all if your dog has hip dysplasia, elbow dysplasia, or any diagnosed joint condition without vet clearance
- Weather isn’t extreme heat, especially for brachycephalic breeds
Gear Worth Having
You genuinely don’t need much to run this program. Two things make a real, measurable difference:
A clicker. The timing precision it gives you, marking the exact instant of a correct behavior, speeds up learning noticeably compared to verbal praise alone, especially for a fast-moving obstacle like weave poles. The HoAoOo dog training clicker is a reliable, no-frills option that’s currently the top-selling clicker on Amazon.
A hands-free treat pouch. Agility training is physical, you’re moving, pointing, and handling at the same time your dog is running. Fumbling in a pocket for treats breaks your timing exactly when it matters most. A pouch like the heouvo treat pouch with built-in clicker clips to a waistband and keeps both your hands and your marker signal ready at once.
If you want the full structured system behind this, everything from foundational obedience through building toward confident course work, our e-book, Beyond the Bark: Inside a Pro Handler’s Playbook for Raising the Ideal Dog, walks through the exact progression professional handlers use, agility included.
About the Trainer
This guide is written from the training philosophy used at ARFS K9 Team, led by Rofiat Muritala, a veteran military K9 handler and certified dog trainer with over 14 years of hands-on experience in working dog training, security operations, and handler development. Her background spans foundational obedience, behavior shaping, and operational evaluation across obedience, detection, and protection work, including representing the Nigerian Army Dog Centre at NADCEL 2026, where she led obedience, detection, and agility course demonstrations. The emphasis throughout her work, and this guide, is on proven, repeatable methods over theory: gradual progression, consistent handling, and respecting a dog’s physical readiness over speed of results.
FAQs
1. Can I really teach my dog agility at home without a trainer or club?
Yes, for recreational purposes. Ground-level obstacles (jumps at low height, tunnels, weave foundation, the pause table) can all be taught at home using the step-by-step methods above. If you want to compete or work with contact equipment at full height, a local club’s supervised sessions become genuinely useful.
2. How long does it take to train a dog for a full home agility course?
Individual obstacles like tunnels and low jumps often click within 1-3 weeks. Weave poles typically take 8-16 weeks. A dog running a full connected sequence confidently usually takes 4-6 months of consistent, short sessions.
3. What age can my dog start agility training?
Ground-level games like targeting, recall through a short tunnel, and walking over a flat board can start around 4 months old. Real jumping and weaving should wait until growth plates close, generally 10-12 months for small and medium breeds, 18-24 months for giant breeds. Confirm with your vet for your specific dog.
4. My dog refuses an obstacle. What does that mean?
Refusals are almost always feedback that the current step is too big, not defiance. Go back to the last version your dog performed confidently, reward more generously, and re-introduce the harder version in smaller increments.
5. Is home agility training safe without a professional watching?
Yes, for the obstacles covered in this guide, as long as you follow the safety checklist: appropriate surfaces, breakaway jump bars, age-appropriate jump heights, and short sessions. Contact equipment (A-frame, dog walk, seesaw) is the exception, those carry real fall risk and are safer learned at a supervised facility.
Conclusion
The equipment you build matters far less than most guides suggest. What actually gets a dog from “curious about a broomstick jump” to “confidently running a connected sequence” is a structured plan: solid foundation obedience first, one obstacle taught in isolation at a time, patient progression on the genuinely hard stuff like weave poles, and handling skills that give your dog clear, consistent information about what comes next.
Your next steps:
- Spend this week on targeting, name response, and a reliable release cue, before touching a single obstacle
- Introduce just the tunnel and a ground-level jump first, and resist raising anything until five clean reps in a row
- Set a realistic timeline: weave poles alone can take 8-16 weeks, and that’s completely normal
- Run through the safety checklist before every session, no exceptions
- If you haven’t built your equipment yet, our DIY equipment guide has the full specs and cost breakdown
Agility at home isn’t about producing a competition dog in a weekend. It’s one of the most reliable ways to turn a bored, high-energy dog into a focused, tired, genuinely happy one, and the training process itself, done right, builds a level of trust and communication between you and your dog that carries into everything else you do together.

Her work centers on applied training across obedience, detection, protection, and operational readiness, with a strong focus on Military Working Dogs (MWDs) and security K9 programs. Rather than relying on theory alone, Rofiat emphasizes proven training methods built on repetition, consistency, and real-world conditioning principles that prepare both dogs and handlers for high-pressure tasks.
Through articles, training content, and documentaries, she shares experience-based insights from the field, highlighting how structured training, clear communication, and trust between handler and dog directly impact performance and reliability.
Drawing from years of frontline experience, she is also the author of “Beyond the Bark: Inside a Pro Handler’s Playbook for Raising the Ideal Dog,” a practical guide designed to help dog owners and handlers apply professional training principles in everyday situations.
She remains committed to responsible K9 development, continuous skill refinement, and practical education for handlers, trainers, and dog professionals.
- How Many Teeth Do Dogs Have? Puppy vs Adult Chart - September 22, 2026
- What Colors Do Dogs See? (Dog Vision Spectrum) - September 22, 2026
- Is Cinnamon Bad for Dogs? Safe Dosage by Weight - September 21, 2026