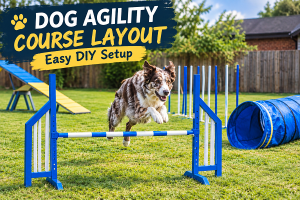
Dog Agility Course Layout: Easy DIY Setup
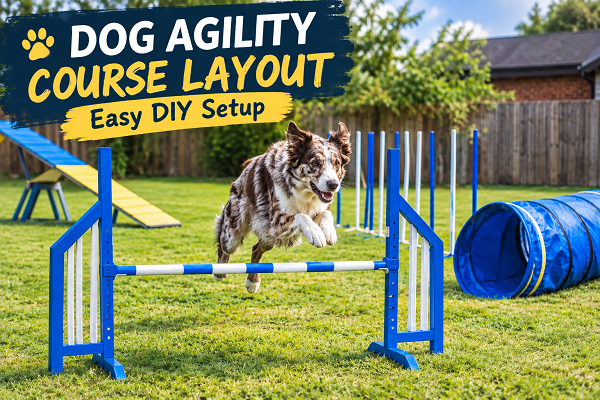
A DIY dog agility course layout needs 4-6 obstacles (a jump, tunnel, weave poles, and one contact obstacle) spaced 10-15 feet apart in a space at least 30 x 40 feet, positioned in a zig-zag or L-shape pattern so your dog runs, turns, and re-engages with you between each one. Most home setups cost under $150 in materials and take a single weekend to build.
Table of Contents
- What Is a Dog Agility Course (And Why Bother Building One)?
- How Much Space Do You Actually Need?
- Official Jump Heights: Sizing Obstacles to Your Dog
- Choosing Your Obstacles: Beginner vs. Intermediate Layout
- Sample Course Layouts (Small, Medium, Large Yards)
- Building the Equipment: Step-by-Step DIY Plans
- What It Really Costs: DIY vs. Store-Bought
- Safety First: Surface, Age, and Breed Considerations
- Training Timeline: What to Expect Week by Week
- Common Layout Mistakes That Slow Down Progress
- Trainer’s Notes: Real Experience from the Field
- FAQs
- Conclusion & Next Steps
What Is a Dog Agility Course (And Why Bother Building One)?
A dog agility course is a sequence of obstacles, jumps, tunnels, weave poles, and balance equipment, that a dog and handler navigate together, usually against a clock. It started as a British dog show intermission act in 1978 and has since grown into one of the fastest-growing dog sports worldwide, with major kennel clubs like the AKC (US), The Kennel Club (UK), and the FCI (international) all running sanctioned events.
But here’s the thing: you don’t need to compete to benefit from one. I’ve set up backyard courses for family pets that never see a trial ring, and the payoff is the same. It builds:
- Physical fitness — active dogs tend to keep fluid in their joints longer, which slows down the effects of aging, according to the American Kennel Club.
- Mental stimulation — agility forces a dog to problem-solve on the move, which tires out high-drive breeds faster than a plain walk ever will.
- Handler-dog communication — you’re reading each other’s body language in real time, which carries over into everyday obedience and recall.
- Confidence — nervous or reactive dogs often loosen up once they learn to trust a novel obstacle.
If you’ve ever watched a Border Collie rip through weave poles and thought “I want that with my dog,” a backyard layout is genuinely the fastest way to start. You don’t need a training center membership or expensive gear. You need a plan, some basic materials, and a Saturday afternoon.
How Much Space Do You Actually Need?
This is the question I get asked more than any other, and most articles gloss over it. Here’s a realistic breakdown:
| Yard Size | What Fits | Best For |
|---|---|---|
| 20 x 20 ft (small yard/patio) | 3-4 obstacles: 1 jump, weave poles (4-6), collapsible tunnel | Puppies, small breeds, apartment dogs |
| 30 x 40 ft (average backyard) | 5-7 obstacles: 2-3 jumps, tunnel, weave poles, tire jump | Most home handlers |
| 50 x 80 ft or more | 8-12 obstacles including A-frame, dog walk, pause table | Serious hobbyists, future competitors |
A full AKC competition course can run 14 to 20 obstacles, with Novice-level courses using 13 to 15, but you don’t need that at home. Three or four well-placed obstacles that you rotate and rearrange will teach your dog just as much as a permanent 12-piece layout, and honestly, rearranging keeps the dog from memorizing the pattern instead of actually reading your cues.
Ground rule: whatever space you have, keep a clear buffer of at least 6 feet around the outer obstacles. Dogs need runway to build speed before a jump and room to land safely after a tunnel exit.
Official Jump Heights: Sizing Obstacles to Your Dog
One thing almost every DIY guide skips: jump height isn’t arbitrary. It’s tied to your dog’s height at the withers (the ridge between the shoulder blades). Setting jumps too high is one of the fastest ways to cause a soft-tissue injury in an otherwise healthy dog.
Here’s how AKC divisions break down for the Regular class:
| Dog’s Height at Withers | Jump Height |
|---|---|
| 11 inches and under | 8 inches |
| 14 inches and under | 12 inches |
| 18 inches and under | 16 inches |
| 22 inches and under | 20 inches |
| Over 22 inches | 24 inches (26″ optional class) |
(These jump height divisions apply across all trial Regular classes and are based on the dog’s height at the shoulder.)
Two details most competitors know but most backyard builders don’t:
- Brachycephalic breeds (Pugs, French Bulldogs, Boston Terriers) typically jump 2-4 inches lower than their long-snouted peers because of their reduced breathing capacity — don’t set their jumps to full breed-standard height.
- Senior dogs — most handlers drop the jump height by 2-4 inches once a dog reaches roughly 8-10 years old to ease strain on aging joints. If your agility dog is getting older, lower the bar before their body forces you to.
For a home setup, I recommend starting every dog, regardless of adult height, at 4-6 inches below their eventual jump height and building up over several weeks. There’s no medal on the line in your backyard, so there’s no reason to rush.
Choosing Your Obstacles: Beginner vs. Intermediate Layout
Not every obstacle belongs in a starter course. Here’s how I sequence it with new dogs and handlers:
Beginner layout (weeks 1-4):
- 1-2 low jumps
- A soft, short tunnel (6-10 feet)
- 4-6 weave poles (widely spaced)
Intermediate layout (weeks 5-10):
- 3-4 jumps at varied heights
- Full tunnel (10-15 feet, can include a gentle curve)
- 6-12 weave poles at standard 20-24 inch spacing
- Tire jump
- Pause table (a sturdy platform for a “stay”)
Advanced/contact obstacles (only after the basics are solid):
- A-frame
- Dog walk
- Seesaw/teeter
A-frames, dog walks, and teeters require the dog to hit painted “contact zones” with at least one paw for safety, and building these badly is a genuine injury risk. Unless you have real woodworking experience, I’d rather see you rent or borrow these three pieces from a local agility club than DIY them from scratch.
Sample Course Layouts (Small, Medium, Large Yards)
Here’s how I’d physically lay these out — think of this as a walking path your dog follows, numbered in sequence:
Small yard (20 x 20 ft) — 4 obstacles
- Jump (at entry)
- Weave poles (angled diagonally across the space to maximize length)
- Tunnel (curved along the back fence line)
- Jump (facing back toward start, completing a loop)
Medium yard (30 x 40 ft) — 6 obstacles, zig-zag pattern
- Jump 1
- Jump 2 (offset 10 ft to the left)
- Tunnel
- Weave poles (positioned along the long axis of the yard)
- Tire jump
- Pause table (finish point)
Large yard (50 x 80 ft+) — 9-10 obstacles, full loop
Run the sequence in a large rectangle or figure-8: jump, jump, tunnel, weave poles, tire jump, A-frame, jump, dog walk, pause table, finish. A figure-8 pattern is especially useful once your dog is comfortable, because it forces tighter turns and better handler-side communication (you’re teaching left/right cues, not just “go forward”).
Spacing tip: give your dog roughly 10-15 feet of straight runway between obstacles at home. Competition courses use more (dogs are moving at full sprint), but for training purposes, tighter spacing actually helps young or nervous dogs stay focused on you instead of building too much speed.
Building the Equipment: Step-by-Step DIY Plans
You genuinely don’t need to buy a $400 equipment set to get started. Here’s what I’ve built and used myself, plus what to watch for.
1. DIY Jump
Materials: 4 x 1.5″ PVC pipes (10 ft length, cut into legs and crossbar), PVC T-joints and end caps, spray paint (optional)
Build: Cut two pairs of legs about 3 ft tall, connect with a T-joint base for stability, then rest a lightweight crossbar pipe across the top using slotted supports (not fixed joints) — this lets the bar fall if your dog clips it, which matters. A rigid crossbar that doesn’t give is a leg-injury waiting to happen.
Cost: roughly $20-30
2. Weave Poles
Materials: 6-12 dowel rods, wooden stakes, or slim PVC pipes; a mallet or ground anchors
Build: Drive poles into the ground in a straight line, spaced 20-24 inches apart. Start wider (even doubling the spacing) for a beginner dog and tighten as they learn the weaving motion.
Cost: roughly $15-25
3. Tunnel
Materials: A children’s collapsible play tunnel, or PVC hoops covered in a heavy tarp
Build: If DIYing from scratch, bend flexible PVC into 3-4 arches, space them 2-3 ft apart, and drape a tarp over the top, securing every arch so it can’t cave in mid-run.
Cost: $25-40 for a play tunnel; $30-50 for materials if building your own
4. Tire Jump
Materials: An old tire (or a length of flexible drainage pipe formed into a ring), rope or chain, a sturdy A-frame stand
Build: Suspend the ring from a horizontal crossbar using two points of rope so it hangs level, at a height matched to your dog’s jump division.
Cost: $10-20 if using a tire you already have
5. Pause Table
Materials: A sturdy plastic storage box, wooden crate, or a small platform built from plywood and 2×4 legs
Build: Table height typically matches roughly half the dog’s jump height. Add a non-slip mat on top.
Cost: $20-40
Safety non-negotiables across every build:
- No exposed screw tips, staples, or splintered wood
- No loose or wobbling joints on anything your dog will stand on
- Nothing with a small enough gap to trap a paw or toe
- Weighted or staked bases on anything freestanding, so wind or a bump doesn’t topple it
If you want a deeper breakdown of specific gear (including which off-the-shelf equipment actually holds up), our essential dog agility equipment guide and our full DIY agility equipment build guide cover it obstacle by obstacle.
What It Really Costs: DIY vs. Store-Bought
| Obstacle | DIY Cost | Store-Bought Cost |
|---|---|---|
| Jump (single) | $20-30 | $60-100 |
| Weave poles (6-12) | $15-25 | $80-150 |
| Tunnel | $25-50 | $70-120 |
| Tire jump | $10-20 | $60-90 |
| Pause table | $20-40 | $100-180 |
| Full basic set (5 obstacles) | $90-165 | $370-640 |
That’s roughly a 70-75% savings by building it yourself, and none of it requires advanced carpentry. The one caveat: if you’re planning to trial competitively down the road, it’s worth eventually training on one or two pieces of regulation equipment (especially contact obstacles) so your dog’s measurements match what they’ll see in the ring.
Safety First: Surface, Age, and Breed Considerations
This is the section most DIY guides rush past, and it’s the one that actually prevents injuries.
Surface matters more than people think. Grass is ideal, soft, and forgiving. Avoid concrete, gravel, or hardpacked dirt for jumping and weaving obstacles; the impact on joints adds up fast, especially for larger breeds. If your only option is a hard surface, use interlocking foam mats under jump landing zones at minimum.
Puppies and growth plates. Don’t run a puppy over full-height jumps or contact obstacles before their growth plates close, generally 9-18 months depending on breed size (smaller breeds close earlier, giant breeds later). Before that age, stick to ground-level obstacles: tunnels, low weave poles, and cavaletti-style ground poles that build coordination without impact.
Senior and injured dogs. As covered above, lower jump heights and shorten sessions. Watch for reluctance to jump, favoring a leg, or slowing down mid-course — these are early signs of joint strain, not stubbornness.
Weather and footing. Wet grass, morning dew, or frost dramatically increases slip risk on turns and landings. If the ground’s slick, skip the jumps that day and work on weave poles or recall games instead.
Supervision, always. Never leave a dog unsupervised on or around agility equipment, particularly tunnels and anything elevated. A collapsed tunnel or a toppled A-frame with no one there to help is a genuine emergency scenario.
Training Timeline: What to Expect Week by Week
Realistic expectations save a lot of frustration. Here’s a general progression I use with new agility dogs:
- Weeks 1-2: Obstacle familiarity. Let the dog sniff, walk through, and get comfortable with each piece at ground level or lowest height. No speed, no sequences yet.
- Weeks 3-4: Single-obstacle mastery. Reward clean, confident use of one obstacle at a time — a jump, then a tunnel, then weave poles individually.
- Weeks 5-6: Two-obstacle sequences. Start connecting a jump to a tunnel, or weave poles to a jump, so the dog learns to transition.
- Weeks 7-10: Full mini-course. Run a 4-6 obstacle sequence at a walk or light jog, building speed gradually.
- Month 3+: Add height, add distance handling, and start introducing verbal/hand cue combinations if you’re aiming toward trial-level work.
Every dog moves at a different pace. A fast, biddable breed like a Border Collie or Australian Shepherd might blow through this timeline in half the time; a more independent or nervous dog might need double. Don’t rush contact obstacles or full jump height just to keep pace with a schedule.
Common Layout Mistakes That Slow Down Progress
- Cramming too many obstacles into too small a space. This causes tight, unsafe turns and doesn’t give the dog runway to build confidence.
- Skipping the “sniff and explore” phase. Dogs that are thrown straight into a full sequence often become hesitant or avoidant of specific obstacles later.
- Using rigid, non-breakaway jump bars. If a bar doesn’t fall when hit, a dog’s leg absorbs that impact instead.
- Ignoring surface conditions. Training on wet or hard ground “because we’re already set up” is how minor slips turn into real injuries.
- Never rearranging the course. A static layout teaches memorization, not handling skills. Move obstacles around every couple of sessions.
Trainer’s Notes: Real Experience from the Field
I’ve built and rebuilt backyard courses for working dogs in training as well as family pets learning agility purely for fun, everything from Malinois in active service work to a 6-year-old rescue mix who’d never seen a jump in her life. The pattern holds every time: dogs that start on a low-pressure, well-spaced home layout progress faster and stay more confident than dogs pushed straight into full-height, tightly packed courses. Confidence built slowly on safe equipment is what actually produces a fast, clean runner later, not rushing the setup.
If you want more structured beginner drills to pair with your new layout, our guide on 5 easy dog agility exercises to start today is a solid next read, and it doesn’t require a full course to get going.
For handlers who want a broader foundation, in obedience, drive control, and working-dog conditioning, alongside agility, our e-book Beyond the Bark goes deeper into the training philosophy behind everything covered here.
FAQs
1. How much space do I need for a basic dog agility course?
A minimum of 20 x 20 feet works for a small starter setup (jump, weave poles, tunnel). For a fuller 5-7 obstacle layout, aim for 30 x 40 feet or more.
2. Can I build a dog agility course without buying expensive equipment?
Yes. Most home obstacles, jumps, weave poles, tunnels, and tire jumps, can be built from PVC pipe, dowel rods, a play tunnel, and an old tire for under $150 total.
3. What age can a puppy start agility training?
Puppies can start ground-level, low-impact obstacles like tunnels and cavaletti poles as early as 8-12 weeks. Hold off on full-height jumps and contact obstacles until growth plates close, generally 9-18 months depending on breed size.
4. How do I know what jump height to set for my dog?
Measure your dog’s height at the withers (top of the shoulder). Dogs 14 inches and under jump 12 inches; 18 inches and under jump 16 inches; 22 inches and under jump 20 inches; over 22 inches jump 24 inches, per AKC divisions. Start lower than this and build up gradually.
5. What’s the safest surface for a DIY agility course?
Level, well-maintained grass is best. Avoid concrete or hard-packed dirt for jumping and weaving obstacles, and always check for wet or slick conditions before training.
Conclusion & Next Steps
Building a DIY dog agility course layout really comes down to three decisions: how much space you’ve got, which obstacles match your dog’s current skill level, and how you’ll keep the whole thing safe as your dog progresses. You don’t need a professional-grade course to see real results, a jump, a tunnel, and a set of weave poles, spaced sensibly and built with basic safety in mind, is enough to start building fitness, focus, and a genuinely stronger bond with your dog.
Start small. Pick 3-4 obstacles from this guide, build them this weekend, and give your dog a couple of weeks to get comfortable before adding anything new. Track their progress, adjust jump heights as they grow or age, and rearrange the layout every so often to keep their brain engaged.
If you found this useful, subscribe to our weekly newsletter for more hands-on training breakdowns like this one, straight from real handler experience, delivered to your inbox every week.

Her work centres on obedience, detection, protection and operational readiness. She favours proven methods built on repetition, consistency and real-world conditioning, so that both dogs and handlers are prepared for high-pressure tasks.
Rofiat represented the Nigerian Army Dog Centre at the Nigerian Army Day Celebration (NADCEL) 2026, where she led demonstrations in obedience, explosive detection, agility and tactical movement. Through articles, training content and documentaries, she shares field-based insight into how structured training, clear communication and trust between handler and dog affect performance and reliability.
She is the author of Beyond the Bark: Inside a Pro Handler's Playbook for Raising the Ideal Dog, a practical guide that helps dog owners and handlers apply professional training principles in everyday situations.
- Dog Agility Course Layout: Easy DIY Setup - October 7, 2026
- Local Dog Breeds: Temperament, Health & Training Guide - October 6, 2026
- How Long Do Military Working Dogs Serve? Full Guide - October 5, 2026