How to Clean Dog Ears to Prevent Infection
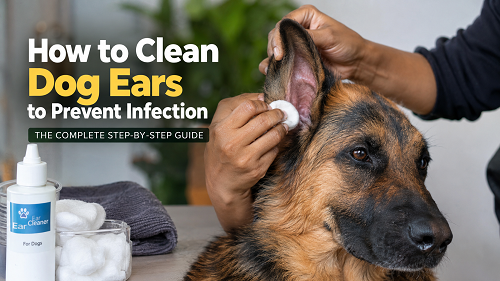
To clean your dog’s ears safely, fill the ear canal with a vet-approved cleanser, massage the base of the ear for 20-30 seconds to loosen debris, let your dog shake its head, then wipe out the loosened gunk with a cotton ball or gauze, never a cotton swab. Do this every 1-4 weeks depending on your dog’s breed and risk factors, and stop immediately if the ear looks red, smells bad, or hurts your dog.
If you want the full picture, why this works, what wrecks it, and how often you actually need to do it, keep reading. I’ll walk you through everything I’ve learned handling working dogs’ ears for years, plus what the research actually says.
Table of Contents
- Why Ear Cleaning Actually Prevents Infection
- How Common Are Ear Infections, Really?
- Signs It’s Time to Clean (And Signs It’s Already Infected)
- What You’ll Need
- Step-By-Step: How to Clean Your Dog’s Ears
- What Never to Put in a Dog’s Ear
- How Often Should You Clean Your Dog’s Ears?
- Breeds and Dogs at Higher Risk
- When to Stop and Call the Vet
- Beyond Cleaning: Other Ways to Prevent Ear Infections
- From the Field: What Working Dog Handlers Know About Ear Care
- FAQs
- Conclusion
Why Ear Cleaning Actually Prevents Infection
Here’s the thing most articles skip: they’ll tell you how to clean ears without explaining why a dog’s ear is such a magnet for infection in the first place.
A dog’s ear canal isn’t shaped like ours. Human ear canals are short and run mostly straight in. A dog’s canal is shaped like an “L”, it drops vertically from the ear opening, then takes a sharp 90-degree turn horizontally before reaching the eardrum. That bend is a trap. Wax, moisture, dead skin cells, and yeast settle right at the corner and just sit there, warm and undisturbed, unless something flushes them out.
Add water from baths or swimming, allergies that trigger extra ear gland secretion, or floppy ears that block airflow, and you’ve built the perfect breeding ground for Malassezia yeast and bacteria like Staphylococcus and Pseudomonas. Regular cleaning breaks that cycle before it turns into a full-blown infection, known clinically as otitis externa.
I’ve handled protection and detection dogs for years, and ear checks are part of the daily routine, not an afterthought. A dog whose ears are irritated won’t focus, won’t track scent properly, and will absolutely let you know about it during a bite-work session. Ears matter more than most pet owners realize.
How Common Are Ear Infections, Really?
This is where a lot of dog owners underestimate the problem and where most articles online just repeat one vague stat. Let’s actually break it down:
- Ear disease accounts for roughly 7.5% to 16.5% of all cases seen in general veterinary practice, with numbers spiking in warmer, more humid months.
- A landmark 2021 study by the Royal Veterinary College (RVC) in the UK, analyzing anonymized records from more than 22,000 dogs, found that about 1 in every 14 dogs (7.3%) develops an ear infection in a given year.
- That same RVC study found some staggering breed-risk multipliers: Poodle breeds had 1.91 times the risk compared to non-Poodle breeds, designer crossbreeds like Labradoodles and Cockapoos had 1.63 times the risk, and dogs with droopy ears had 1.76 times the risk of dogs with upright ears.
- Male dogs carried 1.21 times the infection risk of females in the same study, something almost no article mentions.
- For dogs with existing allergic skin disease, ear disease shows up in roughly 50% of cases. For dogs with food sensitivities specifically, that number jumps to around 80%.
- Once an infection sets in, if it’s ignored, it can progress from otitis externa (outer ear) to otitis media or interna (middle/inner ear) and permanent hearing loss or balance problems become a real risk.
The takeaway? Ear infections aren’t a “some dogs” problem, they’re a “most dogs, eventually” problem, and prevention through cleaning is cheaper, faster, and far less painful for your dog than treatment.
Signs It’s Time to Clean (And Signs It’s Already Infected)
Not every dirty ear needs a cleaning, and not every itchy ear needs medication, but you do need to know the difference.
Time for a routine clean if you notice:
- A light layer of brownish or yellowish wax
- A faint, normal “doggy” ear smell (not sour or sharp)
- Visible dust, dirt, or grass debris after outdoor time
- Slight head shaking after a bath or swim
Stop and call your vet instead of cleaning if you see:
- A strong, sour, or yeasty odor
- Dark, coffee-ground-like discharge (often a sign of ear mites)
- Redness, swelling, or heat inside the ear flap
- Constant scratching, pawing at the ear, or head tilting
- Your dog yelping or pulling away when you touch the ear
- Discharge that’s thick, pus-like, or bloody
Cleaning an already-infected ear can actually push debris deeper and make things worse, plus it’s genuinely painful for the dog. If you’re not sure which category you’re looking at, a quick vet visit for an otoscopic exam settles it fast, and it’s a lot cheaper than treating a ruptured eardrum later.
What You’ll Need
Before you start, gather everything so you’re not chasing a bottle of solution while your dog wriggles off the towel.
- A vet-approved dog ear cleaner (look for one with ceruminolytic and drying properties, ingredients like salicylic acid or malic acid work well)
- Cotton balls or gauze pads (never cotton swabs/Q-tips)
- A towel (you will get sprayed when your dog shakes its head, trust me)
- Treats for positive reinforcement
- A second person, if possible, for larger or wriggly dogs
- Optional: grooming clippers or scissors if your dog has excess hair around the ear canal (common in Poodles, Schnauzers, and Doodles)
Ear cleaning is really just one piece of a bigger grooming routine. If you want the full rundown, brushing, bathing, nail care, and more, our guide on essential dog grooming tips for a healthy puppy covers how to build all of it into a routine your dog actually tolerates well.
Step-By-Step: How to Clean Your Dog’s Ears
Step 1: Pick the Right Moment
Do this when your dog is relaxed, after a walk or play session, not right before something exciting like dinner or a walk. A tired, calm dog holds still far better than an amped-up one.
Step 2: Inspect Before You Clean
Look inside the ear flap. If it’s red, swollen, or smells off, stop here and book a vet visit instead of cleaning.
Step 3: Position Your Dog
For small dogs, sit them on your lap. For medium dogs, have them sit on the floor between your knees. For large dogs, have them sit with their rear end tucked into a corner so they can’t easily back away.
Step 4: Fill the Ear Canal
Lift the ear flap straight up to straighten the canal, then squeeze in enough cleaner to fully fill it. Don’t be shy with the amount, this isn’t a “few drops” job. Avoid letting the bottle tip touch the ear itself.
Step 5: Massage the Base
Gently massage the base of the ear (the cartilage you can feel below the ear canal opening) for 20-30 seconds. You should hear a soft squelching sound, that’s the solution breaking up wax and debris down at the bend of the “L.”
Step 6: Let Your Dog Shake
Step back and let your dog shake its head. This does a lot of the heavy lifting, flinging loosened debris up and out of the canal on its own.
Step 7: Wipe Away the Debris
Using a cotton ball or gauze, wipe out the visible ear canal and flap, only as far in as your finger comfortably reaches (about one knuckle deep). Use a fresh cotton ball for the second ear to avoid transferring bacteria or yeast between ears.
Step 8: Reward and Repeat
Give a treat, praise generously, then repeat the whole process on the other ear with clean supplies.
Total time: This whole process takes about 2-5 minutes per ear once your dog is used to it. First-timers might take 10-15 minutes, that’s normal.
What Never to Put in a Dog’s Ear
This section alone prevents more vet bills than anything else in this guide. Never use:
- Cotton swabs (Q-tips): They pack debris deeper into the canal and can perforate the eardrum.
- Rubbing alcohol or hydrogen peroxide: Both burn on broken or irritated skin and can actually damage healthy ear tissue.
- Vinegar (undiluted or homemade mixes): Popular in DIY articles, but it stings on inflamed skin and offers no real advantage over a proper vet-formulated cleaner.
- Essential oils: Tea tree oil especially is toxic to dogs in concentrated form and has no place near the ear canal.
- Baby oil or olive oil: These can trap moisture and debris rather than clear it, feeding the exact yeast and bacteria you’re trying to prevent.
- Water alone: Plain water doesn’t dissolve wax and can leave the canal damp, exactly the environment that breeds infection.
How Often Should You Clean Your Dog’s Ears?
There’s no single answer here, and any article that gives you one number is oversimplifying. It genuinely depends on the dog.
- Low-risk dogs (upright ears, no allergies, rarely swims): once every 4-6 weeks, or simply when you notice buildup.
- Moderate-risk dogs (some outdoor/water exposure, mild seasonal allergies): every 2-3 weeks.
- High-risk dogs (floppy ears, known allergies, frequent swimmers, prior infections): weekly, or as directed by your vet.
Over-cleaning is a real and often overlooked mistake. Cleaning every single day strips the ear’s natural protective wax layer and irritates the skin, which can actually increase infection risk rather than lower it. More isn’t always better here, consistency matters more than frequency.
Breeds and Dogs at Higher Risk
Ear shape and lifestyle drive most of the risk difference between dogs. Based on veterinary research and clinical data:
| Higher-Risk Factor | Examples |
|---|---|
| Long, pendulous ears | Basset Hound, Cocker Spaniel, Bloodhound, Beagle |
| Curly/dense ear-canal hair | Poodle, Poodle-mix (“Doodle”) breeds, Bichon Frise |
| Deep, narrow ear canals | Shar-Pei, Chow Chow |
| Frequent swimmers | Labrador Retriever, Golden Retriever, Portuguese Water Dog |
| Known allergy sufferers | German Shepherd, French Bulldog, West Highland White Terrier |
On the flip side, the RVC study found Chihuahuas, Border Collies, Yorkshire Terriers, and Jack Russell Terriers had notably lower ear infection risk than average crossbred dogs, mostly thanks to upright ear carriage and better natural airflow. Even so, every breed can develop an infection, so don’t skip ear checks just because your dog isn’t on the high-risk list.
If a lighter grooming load is part of why you chose your breed in the first place, it’s worth checking our list of low-maintenance dog breeds and their basic grooming needs to see where ear care realistically fits into your routine.
When to Stop and Call the Vet
Stop the cleaning process immediately and contact your veterinarian if:
- Your dog yelps, flinches, or tries to escape during cleaning
- You see blood in the discharge or on the cotton ball
- The odor is strong, sour, or “off” even after cleaning
- Redness or swelling doesn’t improve, or gets worse
- Your dog is tilting its head persistently, losing balance, or has one pupil looking different than the other (possible sign the infection has reached the inner ear)
- The ear infection keeps coming back every few months, recurring infections usually point to an underlying cause like allergies or a thyroid issue that needs its own diagnosis and treatment
A vet visit for a straightforward outer-ear infection typically runs $100-$300 depending on your location and whether cultures or imaging are needed. Chronic or severe cases involving surgery (like a total ear canal ablation for end-stage disease) can run into the thousands. Routine cleaning at home costs a fraction of that and takes minutes.
While you wait for or prepare for a vet visit, it also helps to know basic at-home first aid for minor issues you can safely handle yourself, our guide on treating light skin scrapes on small dogs is a good companion resource for building out that home first-aid kit.
Beyond Cleaning: Other Ways to Prevent Ear Infections
Cleaning is one piece of the puzzle, not the whole picture. Pair it with:
- Dry ears thoroughly after baths and swims. Use a towel and, for very floppy-eared dogs, a pet-safe ear-drying solution afterward.
- Manage allergies. If your dog has environmental or food allergies, work with your vet to identify and reduce triggers, this alone can cut recurrent infections dramatically.
- Trim ear hair when needed. For breeds like Poodles and Schnauzers, keeping hair around the canal opening trimmed improves airflow.
- Check ears weekly, even if you’re not cleaning them. A 30-second look-and-sniff catches problems early, before they need medication.
- Don’t over-clean. As covered above, stripping natural wax too often backfires.
From the Field: What Working Dog Handlers Know About Ear Care
I’ll be straight with you, in K9 units and protection dog programs, ear neglect isn’t an option. A dog whose ears are inflamed can’t wear a headset-style bite suit hood comfortably, can’t track scent effectively (a dog’s balance and hearing directly affect how it works a scent cone), and will show performance drops in obedience and agility work well before an owner would notice anything at home.
That’s why professional handlers build ear checks into the same routine as paw and coat checks, after every training session, not once a month. It’s a habit, not an event. If you’re a pet owner, borrowing that same “check often, clean only when needed” mindset from working-dog handling is genuinely one of the best habits you can adopt. It catches problems in days instead of weeks.
For a closer look at how hygiene fits into a working dog’s overall health program, including ears, coat, and nails as part of operational readiness, see our guide on maintaining good health in military working dogs. And if you’re raising a puppy and want that same structured, calm-handling approach to carry over into other routines like crate training, our K9 trainer tips for crate training a puppy walks through the same principles of patience and consistency.
If you want to go deeper into how professional programs structure daily care routines for working and protection dogs, including grooming, conditioning, and health checks the way working K9 units actually run them, check out our K9 handler training e-book, Beyond the Bark.
FAQs
1. How do I know if my dog’s ears need cleaning or if it’s an infection?
Mild wax buildup with a faint, normal smell usually just needs routine cleaning. A strong sour or yeasty odor, redness, swelling, dark discharge, or pain when touched signals infection, see your vet instead of cleaning.
2. Can I use apple cider vinegar or homemade solutions to clean my dog’s ears?
It’s best to avoid homemade mixes. Vinegar and other acidic DIY solutions can sting on already-irritated skin and haven’t been tested for safety the way vet-formulated ear cleaners have. Stick to a product made specifically for canine ears.
3. Is it normal for my dog to shake its head a lot after ear cleaning?
Yes, that’s expected and actually helpful, the shaking flings loosened debris and excess solution out of the canal. Keep a towel handy and let your dog shake it out before you wipe the outer ear.
4. How long does it take to see improvement after starting a regular ear-cleaning routine?
For dogs with mild, recurring buildup (not a true infection), most owners notice less odor and debris within 1-2 weeks of starting a consistent 2-3 week cleaning schedule. Actual infections need veterinary treatment, not just cleaning, and typically clear in 2-4 weeks with proper medication.
5. Do puppies need their ears cleaned the same way as adult dogs?
Yes, the technique is identical, but go slower and use extra treats and praise. Getting a puppy comfortable with ear handling early, even before they need cleaning, makes lifelong ear care far easier and reduces stress at every vet visit.
Conclusion
Cleaning your dog’s ears isn’t complicated once you understand why it matters: that L-shaped canal traps moisture and debris, and regular cleaning is what keeps bacteria and yeast from turning that buildup into a painful infection. With ear disease affecting somewhere between 1 in 14 and 1 in 5 dogs depending on breed and risk factors, this is genuinely one of the highest-value five-minute habits you can build into your dog’s routine.
Here’s your actionable takeaway: figure out where your dog falls on the risk scale, floppy ears, allergies, frequent swimmer, or none of the above and set a cleaning schedule to match. Keep a vet-approved cleaner and cotton balls on hand, skip anything with alcohol or essential oils, and treat a sudden bad smell or redness as your cue to call the vet, not clean it yourself. Do that consistently, and you’ll cut your dog’s odds of a painful, expensive ear infection dramatically.

Her work centres on obedience, detection, protection and operational readiness. She favours proven methods built on repetition, consistency and real-world conditioning, so that both dogs and handlers are prepared for high-pressure tasks.
Rofiat represented the Nigerian Army Dog Centre at the Nigerian Army Day Celebration (NADCEL) 2026, where she led demonstrations in obedience, explosive detection, agility and tactical movement. Through articles, training content and documentaries, she shares field-based insight into how structured training, clear communication and trust between handler and dog affect performance and reliability.
She is the author of Beyond the Bark: Inside a Pro Handler's Playbook for Raising the Ideal Dog, a practical guide that helps dog owners and handlers apply professional training principles in everyday situations.
- Bousnic Dog Training Collar Review: Is It Safe? - September 30, 2026
- Gravy Train Dog Food Review: Ingredients & Recalls - September 30, 2026
- How to Spot Fake AKC Registered Dogs: 5 Warning Signs - September 29, 2026